Showing posts with label flashing. Show all posts

Thursday, 26 January 2017

How To Jailbreak Your Iphone ON IOS 10 using Yalu and Cydia Impactor ( MAC )

Please note that currently this jailbreak is in extreme beta and only has only been tested to support the iPhone 7 and iPhone 7 Plus on iOS 10.1.1. Do not attempt this if you need your device working as the procedure may not succeed and you might have to restore your device. The jailbreak is currently being updated and will soon work with additional devices including the iPhone 6s and iPad Pro on any iOS 10 firmware.

Additionally, Cydia Substrate is not working yet. Your tweaks will not work so again you may want to hold off until yalu exits the beta stage.


Step One


  • Make sure to backup your device using iCloud or iTunes. Only continue if you have an iPhone 7 or iPhone 7 Plus on iOS 10.1.1.


Step Two


  • Download the latest Yalu jailbreak IPA from here and Cydia Impactor from here and save them to a folder on your Mac.
Step Three

  • Double click to open the Impactor dmg.
Step Four

Drag and drop the Impactor app onto the Applications folder shortcut.

Step Five
    • Launch Impactor from your Applications folder.
Click Open if asked to confirm.


Step Six

  • Connect your iPhone to your computer via USB and making sure to select Trust if prompted.
  • Drag and drop the mach_portal+yalu IPA downloaded earlier into the Cydia Impactor app.
Step Seven

  • You will be asked to enter your Apple ID and password. This is only used to sign the IPA, letting it run on your device. 


Step Eight

  • Cydia Impactor will sign the IPA and install the new Yalu jailbreak app (mach_portal) on your device.

Step Nine
  • Once the app has successfully downloaded to your device you must trust the developer profile created under your email address.
  • Tap Settings, then General, then Device Management.


  • Select your email from the Device Management menu


  • Tap Trust (your email)

  • Click the Trust button from the popup that appears


Step Ten

  • Return to the Home screen and launch the Yalu (mach_portal) app. 


  • You'll see a white screen displayed for about 15-20 seconds.

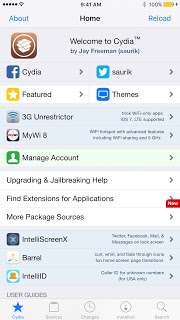
  • Your iPhone will now reboot and you'll have Cydia on your SpringBoard! Congratulations, you're jailbroken! After each restart you will need to relaunch yalu (mach_portal) as this is a semi-tethered jailbreak. After relaunching yalu (mach_portal), you'll be able to launch Cydia and enjoy your jailbreak.


Thursday, 6 October 2016

GFIVE President Smart A98 FLASH FILE

DESCRIPTION


ROM Mobile GFIVE President Smart A98 – ROM Android 4.4.2
ONLY SC7731
Update Official ROM GFIVE President Smart A98 Version :  GFIVE_President_Smart_A98-160408 – SP7731GEA_GFive_new_64+8_RC_151127
—————————————————————————————————————————————————————————————————-
Update Official ROM GFIVE President Smart A98 Version :  GFIVE_President_Smart_A98-151127 – SP7731GEA_GFive_new_64+8_RC_151127
—————————————————————————————————————————————————————————————————-
Update Official ROM GFIVE President Smart A98 Version :  GFIVE_President_Smart_A98-151027 – SP7731GEA_GFive_new_64+8_RC_151027
Install ROM :
FactoryDownload/UpgradeDownload
1 Unpack ROM and extract SP7731GEA_GFive_new_64+8_RC_151027_B1.pac
2 Run UpgradeDownload or FactoryDownload, connect your android device to the computer
3 Click on "Load packet" and add the .pac
4 Click on "Start"
5 During the flashing your mobile will restart automatically
6 Finish
—————————————————————————————————————————————————————————————————-
Official ROM GFIVE President Smart A98 Version :  GFIVE_President_Smart_A98-150811 – SP7731GEA_GFive_new_64+8_RC_150811
Gapps include – No Rooted
Language support: Multilang

Install ROM :
OTA
1.copy ****.zip to root folder of the phone SD card (no need to unzip).
2.Turn off the phone, then keep pressing power button and volume+ button until the robot icon appear, then press power button again
3.Press the volume- to move up and down to choose“wipe data/factory reset”, then press volume+ button to confirm.
4.Choose “yes—delete all user data”, then press volume+ button to enter the page as below.
5.It will enter below page after finishing delete all user data.
6.Then choose“apply update from sdcard”
7.Find and select the ROM, press volume+ to enter the page as below.
8.Please make sure the power is sufficient during the upgrading. It will showed as below when the upgrading finished.
9.Choose “reboot system now”,then press volume+ button to reboot your phone.

Monday, 3 October 2016

T1-701u FIRMWARE


  • ROM Version: 4.4.2
  • Links: 
T1-701u

DESCRIPTION


100% Tested File, Free And No Password.

(1)Download the firmware package from the given link and extract it.

(2)Verify that your SD card is formatted in FAT32 filesystem and has enough free storage.

(3)Unzip Download package or extract zip file.

(4)Now “dload” folder (containing Update.app file) put it to the main directory of your external SD Card.

(5)Next, turn off your device and insert the SD card.

(6)Reboot into forced SD upgrade mode by holding Vol Up + Vol Down + Power buttons at the same time until you see some text on the screen.

It’ll take a few minutes to complete the update. After that, it will automatically shut down and reboot into the new OS.

For more detail type on google how to update huawei via dload file.

Honor 7i ATH-UL00 FIRMWARE

DESCRIPTION


ROM Mobile Honor 7i ATH-UL00 - ROM Android 5.1
ONLY Qualcomm Snapdragon 615 MSM8939
Update Official ROM HUAWEI Honor 7i ATH-UL00 version:  ATH-UL00 C00B210 – Emotion UI 3.1 – Unicom
———————————————————————————————————————————————————
Update Official ROM HUAWEI Honor 7i ATH-UL00 version:  ATH-UL00 C00B190 – Emotion UI 3.1 – Unicom
———————————————————————————————————————————————————
Official ROM HUAWEI Honor 7i ATH-UL00 version:  ATH-UL00 C00B140 – Emotion UI 3.1 – Unicom
Gapps not include – No Rooted
Language support: Multilang

ROM install :
Step one: Prepare an SD card, it is recommended to use Sandisk, Kingstone, or Kingmax, size is recommended that more than 1G.
Step Two: Formatting SD card (optional).
The step three: copy a large package path UPDATA.APP to the SD card dload UPDATA.APP.
Step four: Check the root directory of the SD card you dload UPDATA.APP.
Step 5: SD card into the phone is switched on in the main screen, press the Menu key, the system updates -> SD card upgrade -> confirm -> upgrade, backup data, select the backup data; upgrade.
Step Six: The upgrade process progress bar shows after the finish of the pending progress bar, the phone automatically restart.
or
Step one: Prepare an SD card, it is recommended to use Sandisk, Kingstone, or Kingmax, size is recommended that more than 1G.
Step Two: Formatting SD card (optional).
The step three: copy a large package path UPDATA.APP to the SD card dload UPDATA.APP.
Step four: Check the root directory of the SD card you dload UPDATA.APP.
Step Four: cell phone turned off, insert the SD card, while pressing the volume up button + volume down key switch button, the phone automatically enters the upgrade mode, and then begin the upgrade in Figure
Step Five: After the progress bar to go full fixed, the phone will automatically restart If you do not manually remove the battery.

Honor 7i ATH-TL00H FIRMWARE

DESCRIPTION


ROM Mobile Honor 7i ATH-TL00H - ROM Android 5.1
ONLY Qualcomm Snapdragon 615 MSM8939
Update Official ROM HUAWEI Honor 7i ATH-TL00H version:  ATH-TL00H C01B210 – Emotion UI 3.1 – Mobile
——————————————————————————————————————————————————-
Update Official ROM HUAWEI Honor 7i ATH-TL00H version:  ATH-TL00H C01B200 – Emotion UI 3.1 – Mobile
——————————————————————————————————————————————————-
Update Official ROM HUAWEI Honor 7i ATH-TL00H version:  ATH-TL00H C01B190 – Emotion UI 3.1 – Mobile
——————————————————————————————————————————————————-
Official ROM HUAWEI Honor 7i ATH-TL00H version:  ATH-TL00H C01B171 – Emotion UI 3.1 – Mobile
Gapps not include – No Rooted
Language support: Multilang

ROM install :
Step one: Prepare an SD card, it is recommended to use Sandisk, Kingstone, or Kingmax, size is recommended that more than 1G.
Step Two: Formatting SD card (optional).
The step three: copy a large package path UPDATA.APP to the SD card dload UPDATA.APP.
Step four: Check the root directory of the SD card you dload UPDATA.APP.
Step 5: SD card into the phone is switched on in the main screen, press the Menu key, the system updates -> SD card upgrade -> confirm -> upgrade, backup data, select the backup data; upgrade.
Step Six: The upgrade process progress bar shows after the finish of the pending progress bar, the phone automatically restart.
or
Step one: Prepare an SD card, it is recommended to use Sandisk, Kingstone, or Kingmax, size is recommended that more than 1G.
Step Two: Formatting SD card (optional).
The step three: copy a large package path UPDATA.APP to the SD card dload UPDATA.APP.
Step four: Check the root directory of the SD card you dload UPDATA.APP.
Step Four: cell phone turned off, insert the SD card, while pressing the volume up button + volume down key switch button, the phone automatically enters the upgrade mode, and then begin the upgrade in Figure
Step Five: After the progress bar to go full fixed, the phone will automatically restart If you do not manually remove the battery.

Honor 7i ATH-TL00 FIRMWARE


DESCRIPTION


ROM Phone Honor 7i ATH-TL00 - ROM Android 5.1
ONLY Qualcomm Snapdragon 615 MSM8939
Update Official ROM HUAWEI Honor 7i ATH-TL00 version:  ATH-TL00 C01B210 – Emotion UI 3.1 – Mobile
————————————————————————————————————————————————————————
Update Official ROM HUAWEI Honor 7i ATH-TL00 version:  ATH-TL00 C01B190 – Emotion UI 3.1 – Mobile
————————————————————————————————————————————————————————
Official ROM HUAWEI Honor 7i ATH-TL00 version:  ATH-TL00 C01B140 – Emotion UI 3.1 – Mobile
Gapps not include – No Rooted
Language support: EN/CN

ROM install :
Step one: Prepare an SD card, it is recommended to use Sandisk, Kingstone, or Kingmax, size is recommended that more than 1G.
Step Two: Formatting SD card (optional).
The step three: copy a large package path UPDATA.APP to the SD card dload UPDATA.APP.
Step four: Check the root directory of the SD card you dload UPDATA.APP.
Step 5: SD card into the phone is switched on in the main screen, press the Menu key, the system updates -> SD card upgrade -> confirm -> upgrade, backup data, select the backup data; upgrade.
Step Six: The upgrade process progress bar shows after the finish of the pending progress bar, the phone automatically restart.
or
Step one: Prepare an SD card, it is recommended to use Sandisk, Kingstone, or Kingmax, size is recommended that more than 1G.
Step Two: Formatting SD card (optional).
The step three: copy a large package path UPDATA.APP to the SD card dload UPDATA.APP.
Step four: Check the root directory of the SD card you dload UPDATA.APP.
Step Four: cell phone turned off, insert the SD card, while pressing the volume up button + volume down key switch button, the phone automatically enters the upgrade mode, and then begin the upgrade in Figure
Step Five: After the progress bar to go full fixed, the phone will automatically restart If you do not manually remove the battery.

Honor 7i ATH-CL00 firmware and flashing

DOWNLOADS


DESCRIPTION


ROM Mobile Honor 7i ATH-CL00 - ROM Android 5.1
ONLY Qualcomm Snapdragon 615 MSM8939
Update Official ROM HUAWEI Honor 7i ATH-CL00 version:  ATH-CL00 C92B210 – Emotion UI 3.1 – Telecom
——————————————————————————————————————————————————————–
Update Official ROM HUAWEI Honor 7i ATH-CL00 version:  ATH-CL00 C92B190 – Emotion UI 3.1 – Telecom
——————————————————————————————————————————————————————–
Update Official ROM HUAWEI Honor 7i ATH-CL00 version:  ATH-CL00 C92B171 – Emotion UI 3.1 – Telecom
——————————————————————————————————————————————————————–
Official ROM HUAWEI Honor 7i ATH-CL00 version:  ATH-CL00 C92B111 – Emotion UI 3.1 – Telecom
Gapps not include – No Rooted
Language support: EN/CN

ROM install :
Step one: Prepare an SD card, it is recommended to use Sandisk, Kingstone, or Kingmax, size is recommended that more than 1G.
Step Two: Formatting SD card (optional).
The step three: copy a large package path UPDATA.APP to the SD card dload UPDATA.APP.
Step four: Check the root directory of the SD card you dload UPDATA.APP.
Step 5: SD card into the phone is switched on in the main screen, press the Menu key, the system updates -> SD card upgrade -> confirm -> upgrade, backup data, select the backup data; upgrade.
Step Six: The upgrade process progress bar shows after the finish of the pending progress bar, the phone automatically restart.
or
Step one: Prepare an SD card, it is recommended to use Sandisk, Kingstone, or Kingmax, size is recommended that more than 1G.
Step Two: Formatting SD card (optional).
The step three: copy a large package path UPDATA.APP to the SD card dload UPDATA.APP.
Step four: Check the root directory of the SD card you dload UPDATA.APP.
Step Four: cell phone turned off, insert the SD card, while pressing the volume up button + volume down key switch button, the phone automatically enters the upgrade mode, and then begin the upgrade in Figure
Step Five: After the progress bar to go full fixed, the phone will automatically restart If you do not manually remove the battery.

Friday, 30 September 2016

[EXPERIMENTAL][7.0_r1]AOSP 7.0 (Nougat) for LG G3 (D850)

NOTE: THIS IS WIP SO MANY FEATURES ARE BROKEN, USE THEM FOR TESTING PURPOSE ONLY:
What's working:-Wifi
-Audio
-Camera
-Bluetooth
-Vibrator
-H/W
-MTP
...
What's broken:
-Camcorder
-RIL
-Sensors
-...

Known bugs:
-The camera must capture one pic before adapting to the light.

Screenshots:


Download:
[30082016 V2] : GOOGLE DRIVE
[30082016] : GOOGLE DRIVE
ANDROIDFILEHOST

Kernel source: https://github.com/bangprovn/android_kernel_lge_g3
Device tree:
- G3-Common: https://github.com/bangprovn/android..._lge_g3-common
- D855: https://github.com/bangprovn/android_device_lge_d855

XDA:DevDB Information
[EXPERIMENTAL][7.0_r1]AOSP 7.0 (Nougat) for LG G3 (D850), ROM for the LG G3 

Contributors
bangprovn
ROM OS Version: 7.x Nougat
ROM Kernel: Linux 3.4.x
Based On: AOSP

Version Information
Status: Testing

Created 2016-08-29
Last Updated 2016-08-29